August 30, 2024
Let’s shoot video with an interchangeable lens camera! All the basics and tips for shooting video
Let’s shoot video with an interchangeable lens camera! All the basics and tips for shooting video

Among those of you who have interchangeable lens camera, some of you must think, “I usually take video using my smartphone, but in the future I’d like to try my hand and shooting video with my interchangeable lens camera.” But to shoot video that will turn out the way you want using an interchangeable lens camera, there are several key points you need to know about first. To help get you started, in this article we will provide detailed explanations including the basic knowledge needed to shoot video, how to choose a lens, and various shooting tips.
There are various benefits to shooting video with an interchangeable lens camera. For example, you can shoot with high image quality and in high resolution. An interchangeable lens camera has a large image sensor, meaning it can gather a greater amount of light. That’s why you can record clear video with minimal noise even in dark locations. As interchangeable lens cameras also support recording at high resolutions such as 1080p and 4K, they can finely express video footage down to the fine details.
Additionally, as the name suggests an interchangeable lens camera lets you switch lenses, which makes you can attach lenses with various view angles. With a wide-angle lens you can render landscapes and backgrounds dynamically, or you can use a telephoto lens to produce large bokeh.
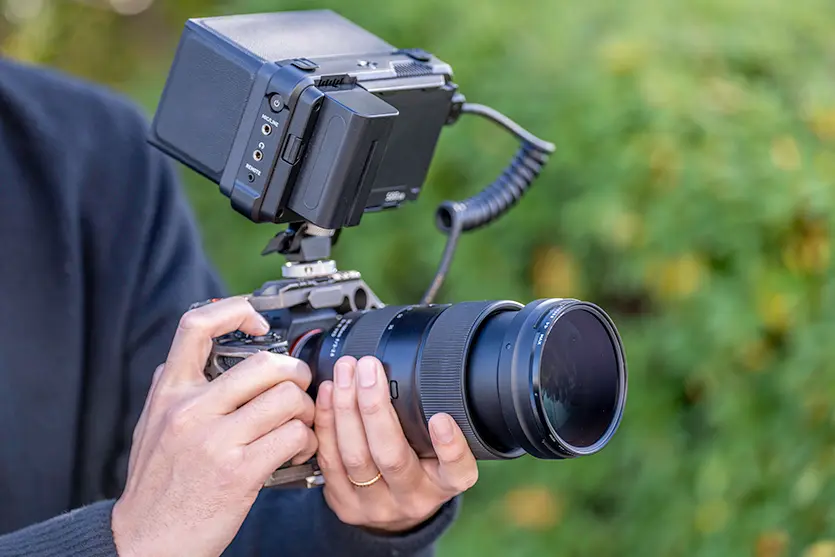
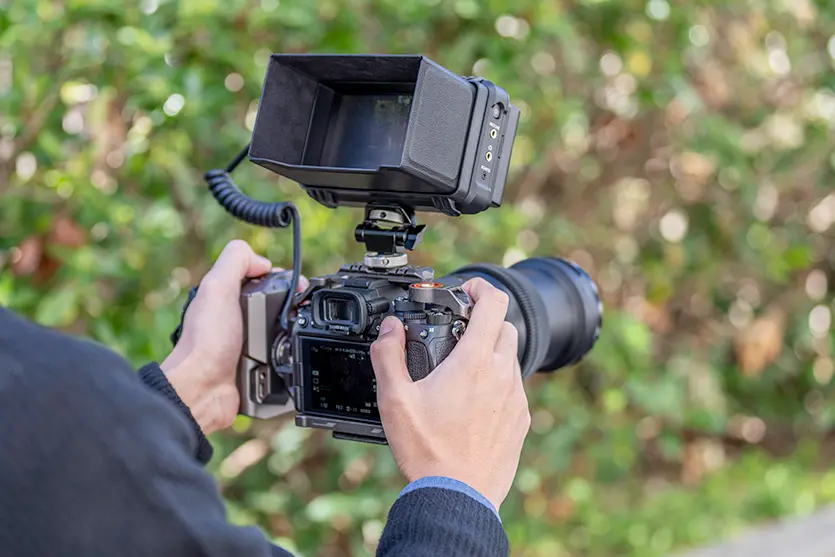
The ability to build a more serious shooting system is another advantage that sets interchangeable lens cameras apart. For example, if you mount your camera to a cage and attach accessories such as external microphones and follow focus mechanisms, you can achieve better audio quality and improve focus tracking performance. Additionally, by attaching a tripod or gimbal stabilizer to the camera’s mount, you can record video with greater stability.
The basic knowledge you need when shooting video with an interchangeable lens camera
There are several key points you need to grasp in order to shoot video well using an interchangeable lens camera. Here we will explain the basics of shooting video.
What is frame rate?
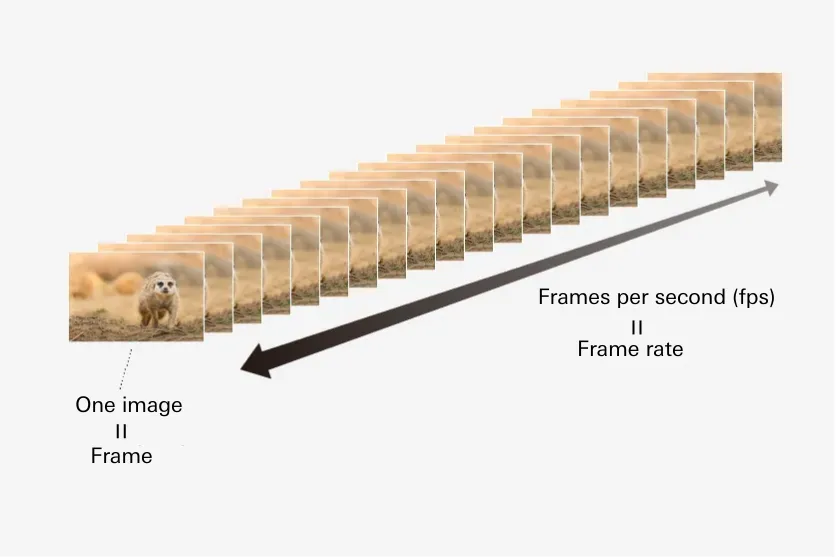
Frame rate is a unit describing the number of images (frames) that make up one second of video, and is expressed as “fps (frames per second)” for short. For example a frame rate of 120 fps means that the camera records 120 frames every second. On the configuration screen of your interchangeable lens camera, the fps may be displayed as something like “60p,” depending on the scanning method.
The appropriate frame rate will vary depending on the intended use of the video. When you want to record a fictional world like you would see in a movie, 24p is recommended. When shooting regular motion for TV, YouTube or similar platforms, 30p is appropriate. When shooting fast-moving subjects such as sports and games, a frame rate of 60p or higher is recommended.
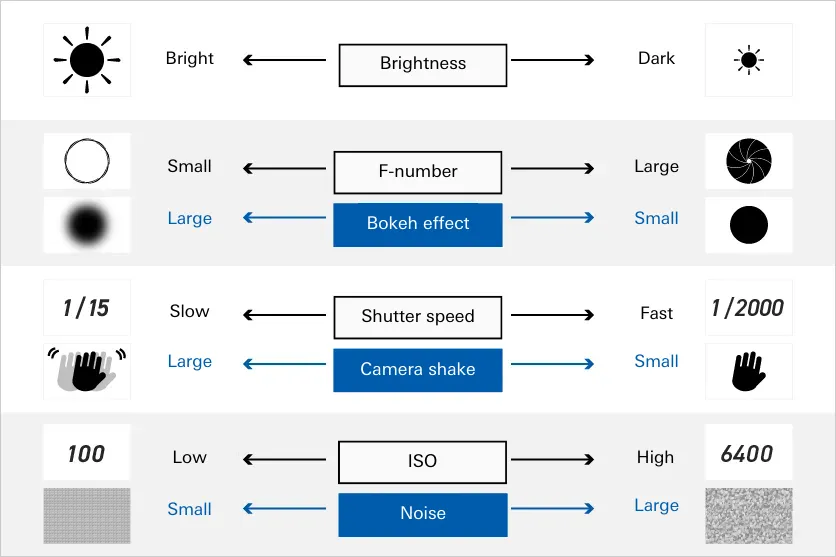
The higher the frame rate, the more smooth movement in the video will appear, but as this requires a faster shutter speed, the amount of light captured in each frame will decrease. For this reason, when shooting at a high frame rate in a dark location, you will need to increase ISO or lower the F-number (increase the aperture) to ensure a sufficient amount of light.
【Tips】Recommendations for quick- and slow-motion shooting
Shooting techniques that make use of differences in frame rates are known as quick- and slow-motion shooting. By setting a different displayed frame rate to the frame rate set when the video was recorded, you can record slow-motion and quick-motion video.
For example, at a displayed frame rate of 30p, if the recorded frame rate was 120 fps then the resulting video will appear as 4x slow motion. Conversely, if the recorded frame rate was reduced to 8 fps, at a displayed frame rate of 30p the resulting video will appear as 3.75x quick motion.
As telephoto lenses tend to produce camera shake, they can be difficult for beginners to handle, but with slow motion recording camera shake becomes less noticeable. That is why we recommend that beginners as well as people who shoot a lot handheld record video with slow motion settings.
What is shutter speed?
Shutter speed is a value indicating the time during which the shutter is open. When it comes to video, the higher the frame rate, the more frames are recorded each second, and the smoother motion in the video appears.
Generally speaking, setting the shutter speed to double the frame rate produces natural-looking video. For example, if the frame rate is 30 fps, a shutter speed of around 1/60 sec. is appropriate.
A fast shutter speeds are selected in still photography to suppress motion blur or blurring of the subject, this may not feel right. But with video, if the shutter speed is too high, the footage tends to look choppy. That is why you should approach this in the sense that the frame rate comes first, with the shutter speed determined accordingly.
What is angle of view?
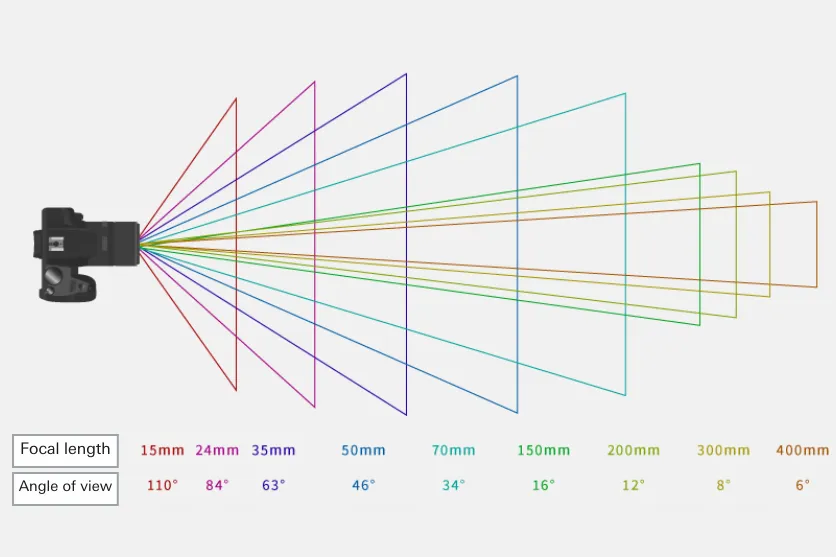
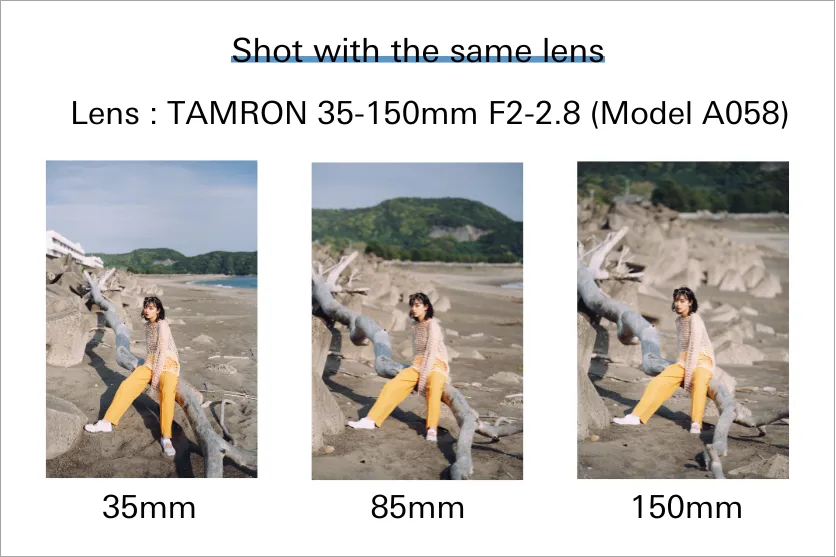
Angle of view indicates the range of an image that can be captured by a camera expressed as an angle. The focal length of a lens determines how large its angle of view is.
For example, a lens with a short focal length is referred to as a wide-angle lens , and is able to record a wide range of a scene. By capturing a dynamic landscape using a wide-angle lens, you can convey the surrounding context to your main subject.
Meanwhile, a telephoto lens has a long focal length and is able to capture a narrow view angle. This allows you to zoom in on subjects that are far away. This kind of lens allows you to zoom in on the expression of a subject or enlarge a faraway subject to give a dramatic impression.
Another important point is how the impression of perspective changes depending on the type of lens.
What is perspective?
Perspective is a visual illusion where objects that are near appear larger, and objects that are far away appear smaller. When shooting video, perspective will appear different depending on the focal length of the lens and the distance to the subject.
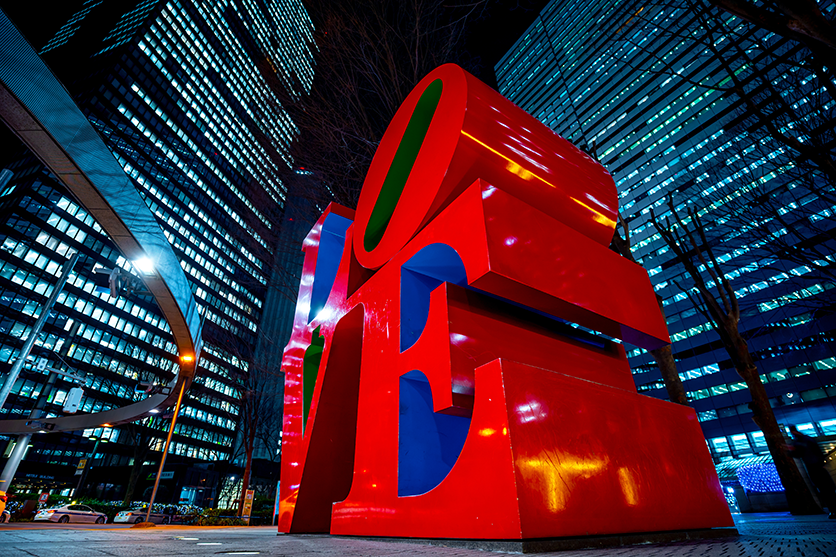
For example, with a wide-angle lens, since the focal length is short, the background will appear wide. And since the depth of field is large, the sense of distance between near objects and distant objects will appear exaggerated (near objects look larger, distance objects look smaller). On the other hand, a telephoto lens has a long focal length that renders a narrow view of the background. And since the depth of field is shallow, the perspective will appear compressed (reducing the apparent difference in size of near and distant objects).
Due to this effect, even if you are shooting from the same location, with a wide-angle lens the background will appear wide and far away, and with a telephoto lens buildings will appear larger and closer. Perspective is an aspect that has a significant impact on expression. Use it effectively to give your footage a sense of depth and presence.
What is depth of field?
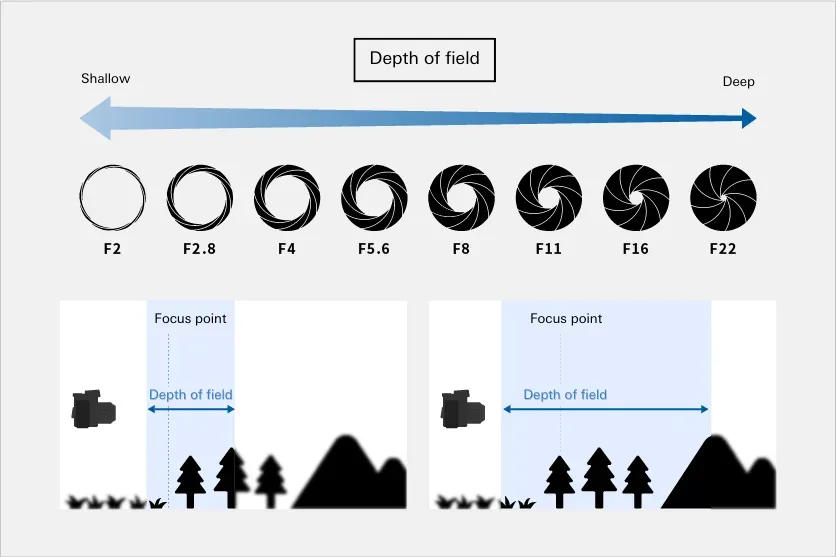
Depth of field is the range over which a subject is in focus. The depth of field varies according to the aperture of a lens. For example, when the aperture of a lens is at its maximum, the depth of field is shallow and there is a lot of bokeh in areas out of focus, and you can produce a deeper depth of field and reduce the amount of bokeh produced by stopping down the aperture of the lens. In this way, you can adjust the amount of bokeh by altering the depth of field, providing variety to the image of the subject.
What is F-number (aperture)?
The F-number on a camera is a figure representing the ratio between the aperture and focal length of a lens, and is an indicator of the brightness (light gathering capability) of a lens and the amount of bokeh it produces. As the smaller the F-number, the larger the aperture of a lens, the more light it will gather and the greater amount of bokeh it will produce. On the other hand a higher F-number value will mean the aperture of a lens is stopped down, letting less light through and consequently reducing the amount of bokeh produced. When you want to shoot video that utilizes the bokeh effects that interchangeable lens cameras are known for, we recommend shooting at or close to the maximum (wide-open) aperture of the lens.
What is ISO?
ISO is a figure representing the light sensitivity of the image sensor in the camera body. The higher the ISO, the more sensitive the image sensor will be to light. This setting allows you to record bright video even in dark locations. However, as noise increases when higher ISO is set, higher numbers are more likely to degrade image quality. Therefore if you want to record video with high image quality, we recommend setting as low an ISO as possible.
How to configure settings on an interchangeable lens camera when recording video
Putting the basic knowledge we have dealt with to use, let’s now look at how to configure an interchangeable lens camera when recording video, and some of the key points you need to be aware of.
Exposure mode
Your interchangeable lens camera will have different modes that function to automatically adjust the exposure of your lens, including “aperture priority mode” and “shutter speed priority mode.” For still photography, “aperture priority mode” is often used, but since the frame rate, an aspect that is extremely important when shooting video, is automatically determined when in this mode, it is not well suited to shooting video.
In general, you should set the exposure mode to manual, configure the shutter speed based on the frame rate, and set the aperture based on the depth of field (amount of bokeh) you desire. Then you should ultimately adjust the exposure using ISO or an ND filter.
Setting frame rate and shutter speed
With regular video, the frame rate is often set to either 30 fps or 60 fps. If you want to record video with a cinematic feel, you can also set the frame rate to 24 fps. Generally speaking, setting the shutter speed to double the frame rate will produce a natural look when recording video. Therefore, if the frame rate is 24 or 30 fps, we recommend a shutter speed of 1/50 sec., and a shutter speed of 1/100 sec. for a frame rate of 60 fps.
* Depending on the camera manufacturer, it may be possible to set a shutter speed of 1/48 sec. when recording video. (Fujifilm X series, etc.)
* For the Sony α series, depending on the generation 1/120 sec. cannot be set, and the nearest shutter speed will be 1/125 sec. With recent models it is possible to configure a “flickerless setting” making it possible to avoid flicker using a high resolution shutter setting. (With the Fujifilm X series, shutter speeds of 1/48, 1/96 and 1/120 can be set.)
Setting F-number and ISO
In order to adjust the shutter speed based on the frame rate, we need to adjust the exposure using ISO. When you want to set a higher F-number value (smaller aperture) in a low-light environment, you should raise the ISO to compensate for the exposure. On the other hand in cases such as when you are recording at or near wide-open aperture outdoors during the day, the brightness might be too great, resulting in blown out exposure. In those situations the use of an ND filter is effective for reducing exposure.
Setting white balance
White balance is a function that allows you to adjust the tone of white colors based on the type of light hitting a subject. When white balance is set to “auto” it will be automatically adjusted, but it can also be adjusted manually in the camera settings. While “auto” mode is handy, the white balance could change from scene to scene, producing unnatural transitions between them. If you are accustomed to recording video, we recommend adjusting the white balance manually.
【Tips】Let’s learn about color correction and color grading
Color correction and color grading are actions performed to adjust the tones of colors in a video. With color correction, you adjust the colors in a video that differ from natural colors due to the camera settings or shooting environment during filming, making corrections so that the tones appear closure to natural colors. More specifically, color correction is performed by adjusting parameters such as exposure, white balance, hue and saturation.
On the other hand, color grading is the process of further adjusting the color tones of a color corrected video, and is performed to give a stylistic look to video footage. Specifically, color grading involves adjusting parameters such as tint, brightness and shadows.
Color correction and color grading are both important actions that can have a significant effect on how your video looks. If you perform color grading on a video that has been color corrected, you can create a more appealing image. To perform these actions effectively, it is important for the original video to be recorded with a natural white balance. This is one of the reasons why it is important to adjust the white balance.
Three key points for good results when shooting video
Next, we will give some tips on how to shoot video well using an interchangeable lens camera, putting to use the basic knowledge and settings we have dealt with so far. Here are three key points you should keep in mind when shooting video.
Use frame rate and shutter speed as the basis for settings
First it is important to make frame rate and shutter speed the basis for settings. After first determining the frame rate, adjust exposure and other settings. In general, set an frame rate of 30 fps, or 60 fps when you desire smoother motion. As we noted earlier, a natural shutter speed is generally determined by the frame rate. Try out various settings to find a combination of settings that produces the expression you want to capture.
Adjust for excess exposure using an ND filter
As the shutter speed may be slow depending on the frame rate, when you increase the amount of bokeh (set a low F-number value), there could be too much light, causing blown-out exposure. Particularly when filming outdoors in clear weather, video tends to be over-exposed, and you may not be able to compete with the brightness by reducing ISO alone. In these cases, use an ND filter to reduce the amount of light.
Fix the camera position and view angle
Fixing the camera position and view angle is an important point to consider when shooting video. Beginners tend to move the camera to follow a subject, but too much movement can cause camera shake. That is why it is best to fix the positioning of the camera in place as much as possible while filming.
Repeatedly zooming in or zooming out during filming can also make the footage difficult to watch. It is important to resist the temptation to zoom in or out and maintain a fixed angle of view as much as possible during filming. When necessary, film zoomed in or zoomed out scenes separately and bring the scenes together during the editing process.
Tips for shooting video based on the scene
Now let’s apply what we have learned and take on the challenge of shooting video. Here we will give you some tips on shooting video based on different scenes and subjects.
When filming people, portraits and vlogs
When you are shooting video of people, taking portraits or recording a vlog, it is generally recommended to use a standard lens with a focal length between 35mm and 50mm. A standard lens will produce a realistic sense of distance from the subject and produce a natural mood. If you want to produce bokeh, shoot with a large aperture (low F-number value) set.
However as noted above, as over exposure can easily occur in bright environments depending on a large aperture and the shutter speed, attach an ND filter to adjust the amount of light.
When filming landscapes
Landscape videos can tend to look monotonous with a fixed angle of view. Try shooting zoomed in and zoomed out views separately and combine them in the editing stage to give visual variation to your video. If you use an all-in-one zoom lens you will be able to zoom in and zoom out flexibly.
In terms of adding variation to your video, we also recommend making use of quick- or slow-motion during filming. Slow motion is useful for emphasizing the serenity or grandeur of a landscape. Additionally, when you want to properly show the entirety of a landscape, you can capture clear footage free from camera shake by using a tripod.
An ND filter is another must-have item. When filming during the day in clear weather, it is easy for an image to be blown out due to over exposure. It is essential to use an ND filter in those situations.
When filming sports
When you want to capture motion smoothly, set a higher frame rate such as 60 fps. In addition, when you are filming from far away such as in spectator seating, you will need to use a telephoto lens. As telephoto lenses are prone to camera shake, make full use of VC (Vibration Compensation) mechanisms, or utilize a tripod when this is difficult.
Just note that when you use a tripod it will become harder to freely move the camera, so we recommend deciding on your shooting position in advance. For peace of mind, you should also check the rules where you plan to film, as the use of a tripod may be prohibited. Incidentally, a dedicated video mount is useful as the mount that connects the camera body to a tripod. As a video mount enables you to perform pan and tilt movements smoothly, it makes it easier to track subjects.
Choosing a lens when shooting video
Once of the real pleasures of shooting video with an interchangeable lens camera is the ability to switch lenses. Here are some key points to be careful of when choosing lenses for shooting video.
Maximum aperture (F-number value)
When considering optical performance, the first thing you should look at is the maximum aperture (F-number value). A fast-aperture lens with a small F-number value makes it easier to capture bright video even in conditions with minimal light, and also enables you to shoot video with beautiful bokeh.
The “look” of a lens
Even lenses with similar specifications can have unique characteristics depending on the manufacturer, such as colors, how they render bokeh and tones. That is why wherever possible you should choose lenses that match the look of the video you want to express. In addition, if the expression in your videos is important to you, you should use lenses from the same manufacturer to give consistency to the overall look.
Focus breathing
Focus breathing is a phenomenon where the angle of view changes when the focus is shifted. When shooting video, focus shifting techniques, such as shifting focus from the background to a foreground subject, are often used. For this reason, a lens with minimal focus breathing helps create natural video footage.
Zoom and focus shift
Misalignment in the optical axis at the wide end and telephoto end of a lens is known as “zoom shift,” while the phenomenon where the image goes out of focus when the focal length (angle of view) is changed is known as “focus shift.” When choosing a lens, check which angles of view cause the image to go out of focus when performing focusing operations.
AF (autofocus)
AF performance is another key point to check to determine whether a lens can smoothly focus on objects. Check how well a lens can track moving objects, and where the subject goes out of focus when moving back and forth. The quietness of operating noises is another aspect of a lens you should check.
VC mechanism
If you have a VC mechanism not only inside the camera body but built in to the lens, you will be able to suppress camera shake for greater stability. This is particularly useful when shooting in conditions that are susceptible to camera shake, such as when using a telephoto lens or shooting handheld.
Moisture-Resistant Construction
When shooting video, slightly poor weather, filming near water or shooting in a low position could damage your lens. If your lens has a Moisture-Resistant Construction, you will be able to concentrate on filming your subject even under poor conditions such as these.
Operability
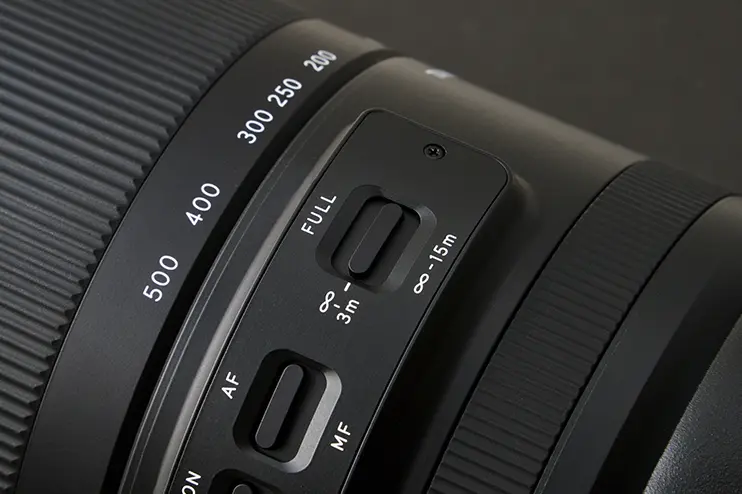
Lens operability is another important point to confirm. For more authentic filming, there will be situations where accurate manual focusing is required. That is why you should check lens features such as the effort required to get the focusing ring or zoom ring moving, the smoothness of those movements, operation of an AF/MF toggle switch, and so on.
Weight and compactness
If your lens is lightweight and easy to handle, it will be easier to film from a variety of positions and angles. If you will shoot a lot handheld or for extended periods, this is a particular point you should check in advance. A compact lens is also useful for carrying around during travel.
Start recording high-quality video using the TAMRON Lens UtilityTM
If you want to record high-quality videos, it is useful to have features to support video recording not just in your camera body but on the lens side as well. TAMRON Lens Utility is a tool that provides support for serious video recording with interchangeable lens cameras. For example, the features of the TAMRON Lens Utility are utilized to the fullest extent in the short film Findley.
Finally, we would like to introduce the features and functions available with this product.
What kind of product is TAMRON Lens Utility?
TAMRON Lens Utility is a piece of software provided by TAMRON. By connecting a lens equipped with a connector port to a compuer or smartphone, you can customize the lens, run firmware updates and more. TAMRON Lens Utility is also packed with functions to conduct serious video shoots efficiently.
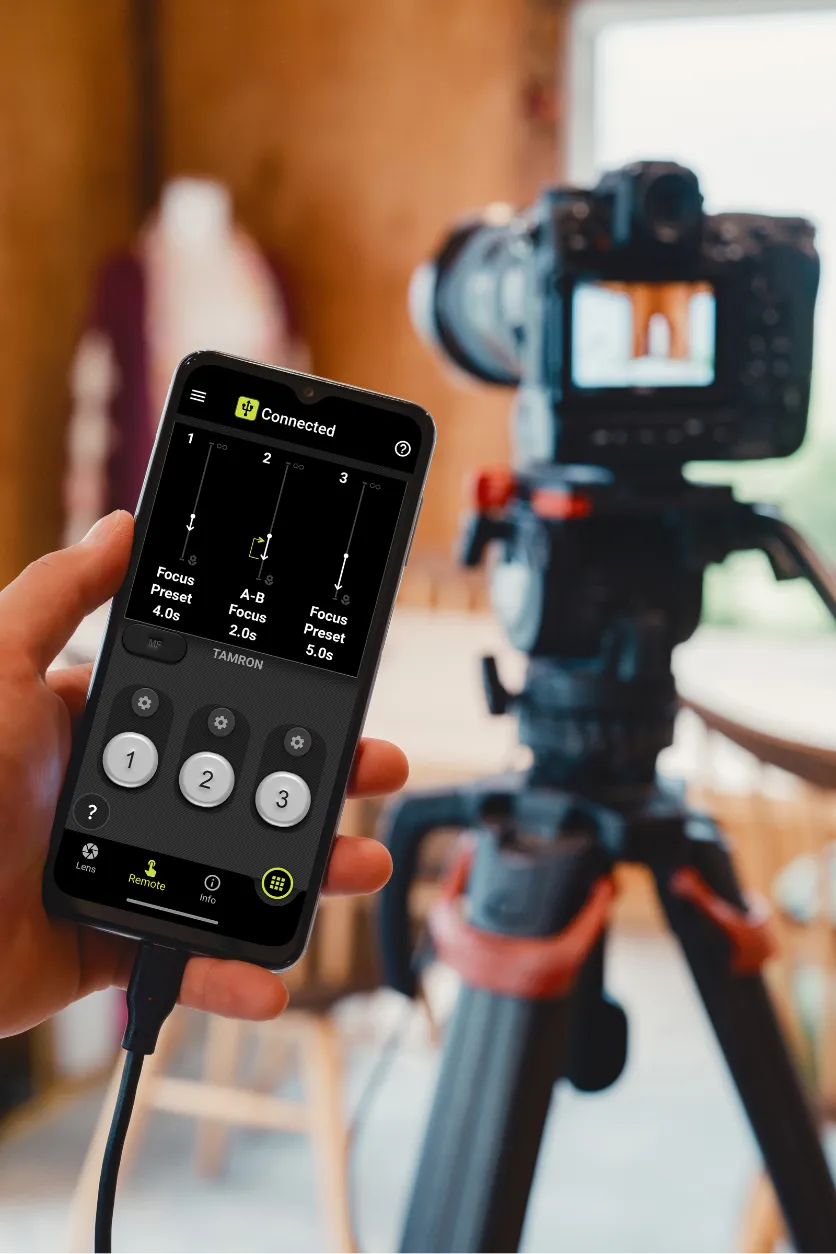
A-B Focus - easily shift between two focal points
A-B Focus is a function that shifts the focus at a set speed. This allows you to shift back and forth between two preset focal points. Using this function, you can capture the type of footage that is often used in the moviemaking field, such as shifting the focus between a subject in the background to one in the foreground to guide the viewers where to look.
Focus Preset - useful for scene transitions
The Focus Preset function lets you save a preset focal point and shift focus to it. As with A-B Focus, this lets you shift focus from the foreground to the background smoothly. Intentionally defocusing on the subject lets you produce an expression similar to a scene transition in a drama.
Focus Limiter - facilitates smooth focusing
The Focus Limiter function prevents the lens from focusing on an obstruction when you are shooting a scene where there is an object in front of the subject. Limiting the focal length to within a certain range ensures that you can quickly regain focus on the desired subject even if it is lost.
MF Method - useful when manual focus is set
MF Method is a function that lets you adjust how the focus moves when shooting in MF (Manual Focus). You can choose from “Non-Linear,” where the amount of focal point movement changes based on how fast you rotate the Focus Ring, and “Linear,” where the focal point moves based on how much you rotate the Focus Ring. Use “Linear” when you need to focus as intended while shooting video. When shooting in a cinematic style that requires more detailed focusing adjustments, you can use 270°, or set something like 180° for video-like shooting.
Select AF/MF enabling easy focus mode switching
Select AF/MF is a function that lets you use the focus set button to switch between AF and MF even on a lens that lacks a dedicated AF/MF toggle switch.
<Conclusion>Determine the functions of your interchangeable lens camera and the characteristics of your lenses in order to shoot video that turns out the way you want!
To shoot video the way you want with an interchangeable lens camera, it is important to properly determine the functions of your camera and the performance of the lenses you will use. As the required settings vary depending on the situation, understanding this information will help you use the right settings and lenses. If the lens itself can also be customized, it will further expand the possibilities for expression. If you are looking to get the most out of your interchangeable lens camera, we recommend using the TAMRON Lens Utility.

Lens Featured in this Impression
-
-
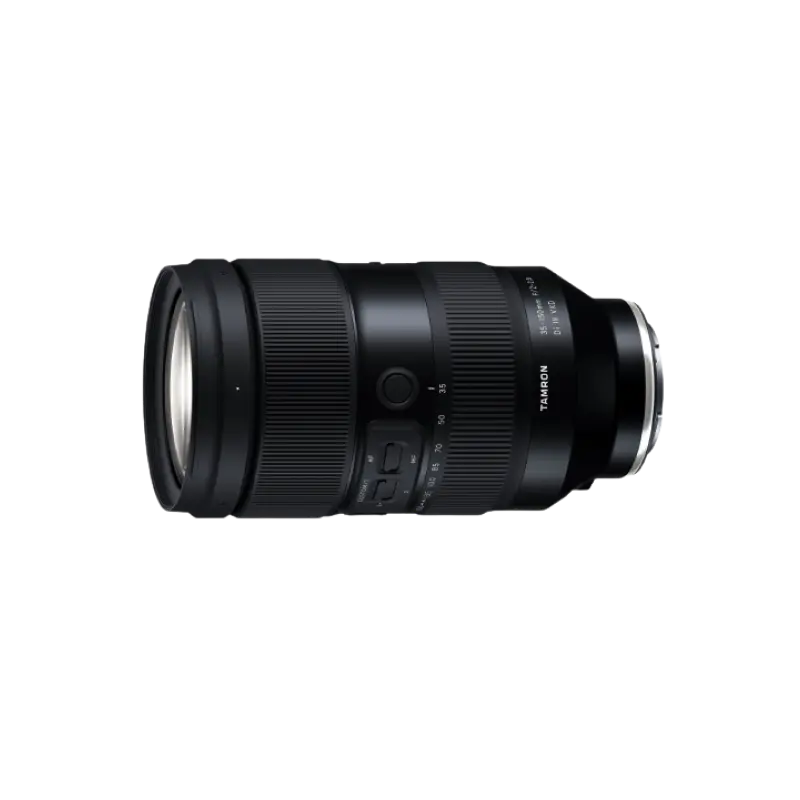
35-150mm F/2-2.8 Di III VXD a058(Model )
The 35-150mm F/2-2.8 Di III VXD (Model A058) is a high resolution travel zoom lens that covers everything from the 35mm wide angle to the 150mm telephoto focal length, the first zoom lens achieving an aperture of F2 at the wide angle end. It has a groundbreaking fast-aperture and utilizes the linear motor focus mechanism VXD (Voice-coil eXtreme-torque Drive), thereby achieving high speed, high precision autofocusing. The innovative lens design enabled us to greatly improve the lens's grip and functionality. The software, developed in-house, enables to easily customize functions and to update firmware.
-
-
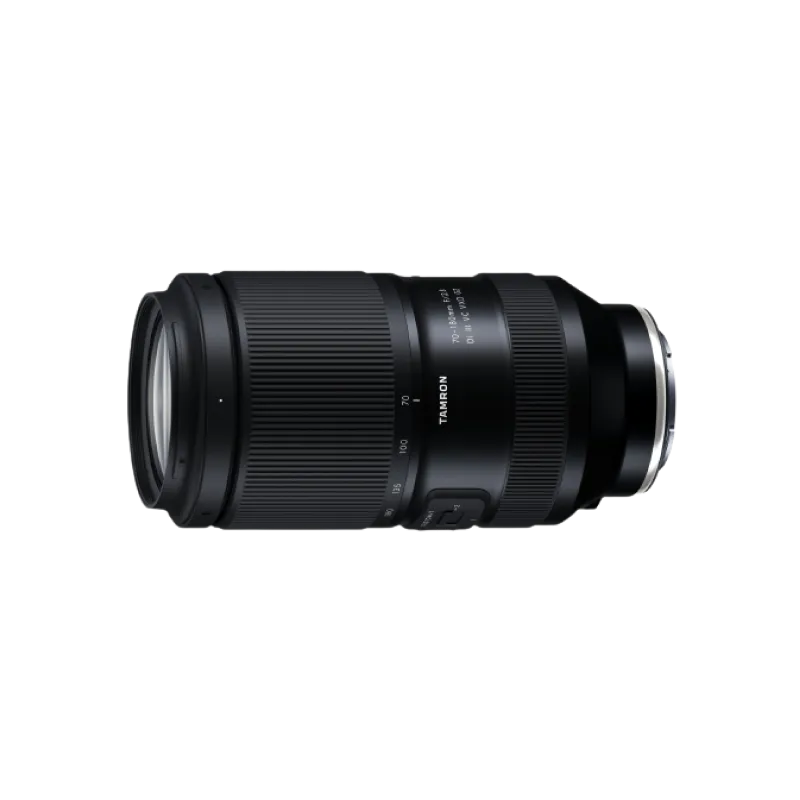
70-180mm F/2.8 Di III VC VXD G2 a065(Model )
70-180mm F/2.8 Di III VC VXD G2 (Model A065) has evolved to G2 level.This is the world’s smallest and lightest, fast-aperture telephoto zoom lens for Sony E-mount and Nikon Z mount with astounding portability and superb image quality.
-
-
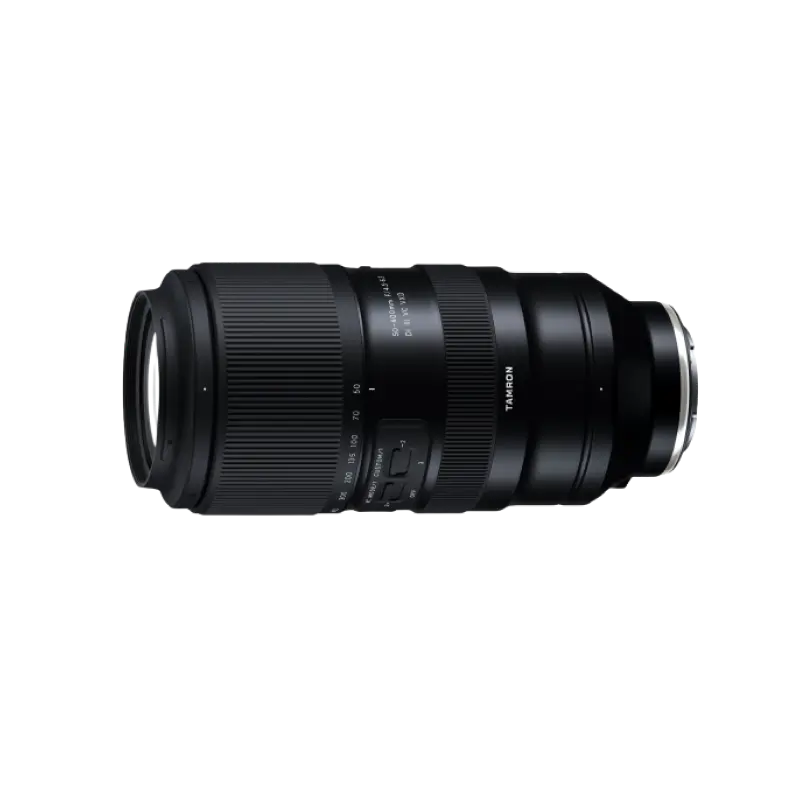
50-400mm F/4.5-6.3 Di III VC VXD a067(Model )
The 50-400mm F/4.5-6.3 Di III VC VXD (Model A067) is an ultra-telephoto zoom lens with an 8x zoom starting at 50mm at the wide-angle end and compatible with full-frame mirrorless cameras. The lens delivers uncompromised high image quality over the entire 50-400mm focal length range, yet is as compact and lightweight as a 100-400mm class lens. Equipped with the VXD mechanism and the VC mechanism, the lens can quickly focus on the subject's movement when shooting sports and wild birds. The 50-400mm F4.5-6.3 VC is a new ultra-telephoto zoom lens that combines unparalleled image quality and mobility.

