June 20, 2025
[Tips for taking panning shots with a sense of speed] Learn how to take beautiful, blur-free shots by mastering the settings and procedures
[Tips for taking panning shots with a sense of speed] Learn how to take beautiful, blur-free shots by mastering the settings and procedures
![[Tips for taking panning shots with a sense of speed] Learn how to take beautiful, blur-free shots by mastering the settings and procedures](/global/consumer/article_file/file/article-what-is-panning-shot/0.webp "[Tips for taking panning shots with a sense of speed] Learn how to take beautiful, blur-free shots by mastering the settings and procedures")
"Panning" is a shooting method that creates a sense of speed by focusing on the subject while shooting only the background. It not only creates a sense of dynamism, but also allows for artistic expression like a painting. It may seem difficult for beginners, but by practicing with basic camera settings and tips, you will gradually be able to take beautiful panning shots. In this article, we will explain the basics, such as shutter speed and how to hold the camera.

Panning is a technique that allows the camera to follow a moving subject, making the background appear to flow while keeping the subject in focus. By releasing the shutter while moving the camera at the same speed as the moving subject, the background becomes blurred, creating a sense of dynamism.
This is a particularly effective technique for subjects that move in a certain direction, such as cars, trains, running people, and animals. In addition, the movements of cars running on trains and roads are easy to predict, making them an easy subject for beginners to start with.
Reasons why panning fails
Have you ever tried panning but failed to get the shot you wanted? The main reasons for failure in panning are poor settings on your single-lens camera, poor holding form, and poor focus. Here are some common examples of mistakes.
Shutter speed setting error
One of the most common mistakes when panning is setting the wrong shutter speed. The slower the shutter speed, the more dynamism can be emphasized, but it is also very difficult to achieve, and even if you are tracking the subject, the subject itself will be blurred, resulting in a blurred overall photo.
On the other hand, if the shutter speed is too fast, the background will not be blurred and the photo will look no different from a normal still image. Generally, shutter speeds between 1/60 and 1/125 seconds are easy for even beginners to try.
Your camera position is unstable
The form in which you hold the camera can also be a cause of failure. If you try to move the camera using only your wrist or arm, the movement will be awkward and you will not be able to follow the subject smoothly.
Move your body so that your entire upper body rotates around your core. You can achieve smooth movement by keeping your sides tight to stabilize the camera and rotating your whole body around your waist. Also, instead of following the subject only at the moment you release the shutter, it is important to start following the subject before it comes into view and continue following it at the same speed even after the shutter is released.
Out of focus
Focusing is also one of the reasons why panning fails. Since you are shooting while following a moving subject, you can use continuous autofocus (AF) to keep the focus on the subject's movements at all times.
Setting the AF area is also important. Set it to Zone or Flexible Spot, and try to focus on the part of the subject you most want to capture (for example, the headlights of a car or a person's facial expression).
Tips for successful panning
From here, let's take a look at some specific tips for panning.
Shooting mode: Shutter speed priority or manual
The shooting mode best suited for panning is shutter speed priority mode. In shutter speed priority mode, you set the shutter speed, and the camera will automatically adjust the aperture value to give you the correct exposure. Since the shutter speed setting is key in panning, this mode is easy to use.
As you improve, manual mode is also recommended. You can adjust not only the shutter speed but also the aperture value and ISO sensitivity yourself, giving you more control over the expression.
The shutter speed is based on 1/60 seconds

The key to panning is the shutter speed setting. Beginners should start with a shutter speed of 1/60 to 1/125 seconds.
Once you become accustomed to shooting, you can gradually slow it down to 1/30 seconds, then 1/15 seconds to create a greater sense of speed. The slower the shutter speed, the more the background will appear to flow, creating a more dynamic impression. However, the slower the shutter speed, the more difficult it becomes, so first master panning at 1/60 seconds.
F-number and ISO sensitivity settings
In shutter speed priority mode, the F-number (aperture value) is set automatically, but you should check the image to make sure that the exposure is appropriate. Generally, F8 to F11 is a good guideline.
ISO sensitivity should be around ISO100 to ISO400, and should be increased if it is dark. On the other hand, if the ISO sensitivity is too high, noise may become noticeable, so even if it is high, it should be around ISO3200 to ISO6400.
Also, shooting with a slow shutter speed on a sunny day is prone to overexposure. In such situations, it is effective to use an ND filter (neutral density filter).
Autofocus (AF) is set to follow
When photographing a moving subject, choose continuous AF, which tracks the subject.
For the AF area, it is a good idea to set it to a relatively fixed setting, such as Zone or Flexible Spot. There are tracking functions that automatically recognize the subject and eye AF, but when panning, the background also moves, so it is common not to use these.
Shooting in burst mode

When taking panning shots, try using continuous shooting. Press the shutter just before the subject enters the frame, and continue shooting after the subject has passed to make it easier to capture the best shot.
Follow the subject with proper form
Smooth camerawork from a stable posture is essential for panning. The key is to stand firmly with your feet shoulder-width apart. Press the viewfinder against your forehead and keep your arms close to your sides to prevent body shake.
Move the camera as if rotating your entire upper body, rather than using your wrists or arms to move it. Imagine your shoulders and arms moving in unison with your hips as the axis to make camera movement smoother. Also, try to keep your body following the subject even after the shutter is released. Keeping this follow-through in mind will make it easier to capture a blur-free subject.
Decide on the composition and wait
Consider the composition in advance, anticipating the moment the subject will pass by. Imagine the background against which you will capture the subject, and wait in that location.
It is also important to choose the background carefully. A monotonous background (such as a blue sky or a solid-colored wall) makes the effect of the flow less obvious. A background with patterns and colors, such as trees or signs, will make the effect of the flow more clear and emphasize the sense of speed. Also, be aware of the direction of the light. Backlighting makes the subject's silhouette stand out, while frontlighting brings out the subject's colors and textures more vividly.
Use a monopod
If you are not used to shooting handheld, if you are shooting for a long time, or if you are using a heavy telephoto lens, consider using a monopod. Unlike a tripod, a monopod reduces vertical shake while allowing greater freedom of movement in the lateral direction, making it suitable for panning.
The key to using a monopod is to use it while slightly floating rather than pressing it against the ground. This allows you to move it smoothly from side to side in accordance with the movement of the subject. It is also more effective to choose a tripod head that allows for smooth movement, such as a video head or a fluid head.
Tips for panning depending on the scene
Panning is a photography technique that can be used in a variety of scenes. Here we will introduce some tips for shooting typical scenes.
Sports

Panning shots in sports scenes are ideal for capturing the dynamism and tension of athletes. It is particularly easy to shoot sports that move in a certain direction, such as track and field, cycling, and skiing. It is best to start with a shutter speed between 1/60 and 1/125 seconds.
The important thing in sports photography is to predict the movements of the athletes. Observe the flow of the competition and understand what course the athletes will take and what play they will make next. By starting continuous shooting one beat before the athletes enter the frame, you will be less likely to miss the decisive moment. Also, by being conscious of the angle at which you can see the athletes' expressions, you can increase the variety of expressions.
Children
Photographing children can be difficult to do panning shots as their movements are unpredictable. However, if you choose a scene where the movements are easy to predict, such as playground equipment, you can take relatively stable shots. Swings, slides, and bicycles are good targets.
Start with a shutter speed of around 1/60 seconds and adjust it according to the speed of the child's movements. With children, facial expressions are particularly important, so be mindful of choosing an angle that makes their face look beautiful. Also, taking pictures from the same eye level as the child will help bring out a natural expression.
Railway
Trains are a good subject for practicing panning, as their path is clear and their speed is constant. Shutter speeds are generally between 1/30 and 1/125 seconds, and should be adjusted depending on the speed and distance of the train.
When photographing trains, it is important to start moving your body a few seconds before the train passes, and continue to follow it at the same speed after it has passed. It will be easier to focus if you decide on a focal point, such as the front of the train, its distinctive shape, or the window.
It is effective to choose a location with a distinctive background for the shoot. We recommend places that create a contrast between the train and the background, such as station platforms, tree-lined streets beside the tracks, and railroad crossings. However, be sure to shoot from a safe location and avoid any actions that may disturb passengers or interfere with operation.
Motorsports

Shooting at a circuit and other locations is difficult because the cars are moving at high speeds, but it also allows you to take photos that are full of dynamism.
Beginners should start with a shutter speed of around 1/125 seconds, and gradually slow down to 1/60 seconds and 1/30 seconds as they become more accustomed to the subject. In car races, it is relatively easy to capture scenes where the car is slowing down around corners, and you can get dynamic images.
When shooting, keep your arms close to your sides and imagine rotating around your waist, moving the camera smoothly in accordance with the movement of the machine. Make use of the continuous shooting mode and find an angle that shows off the coloring and distinctive design of the racing vehicle.
Animal
Wild animals are difficult to predict, making them a challenging subject to panning. It's a good idea to start by practicing in a place where their movements are easy to predict, such as a zoo. Animals running around in cages and flying birds are good candidates.
Telephoto lenses are often used to photograph animals, which can easily cause camera shake, so consider using a monopod. Start with a shutter speed of around 1/60 to 1/125 seconds, and adjust according to the speed of the animal's movements.
Also, study the animal's habits in advance and try to predict its movement patterns. For example, if you know the time of day when they head to feeding grounds and their preferred habits of passing through certain places, you'll be able to wait for the perfect opportunity to take a picture.
Tips for choosing the right lens for panning
It is important to choose the appropriate lens to suit the subject and shooting scene. Here we will explain how to choose a lens suitable for panning.
Focal length
When taking panning shots, it is important to choose a lens with an appropriate focal length depending on the distance to the subject and the shooting scene. When shooting motor sports, wildlife, and other subjects from a long distance, a telephoto lens of 200mm or more is typical.
On the other hand, when taking panning shots in the city or shooting subjects at close range, a standard zoom lens of around 50mm is easier to use. A moderately wide angle of view allows you to create a composition that includes the surrounding environment, resulting in a natural-looking shot.
Maximum aperture
A lens with a small maximum aperture, such as F2.8, makes it easier to obtain proper exposure even in dark environments, and allows you to take bright, beautiful photos. The bokeh is also larger, making it possible to highlight the charm of the subject.
Weight and compactness
When panning, you often hold the camera for long periods of time, so we recommend a lighter lens. Compact lenses also take up less space and are easier to handle, making it easier to move the camera around smoothly. Telephoto lenses tend to be large and heavy, so you should also consider using a monopod.
AF performance
In panning, a lens with fast and accurate AF performance is ideal because it tracks moving subjects. In particular, choosing a lens with high subject tracking performance will reduce failures.
Also, depending on the shooting scene, you should be aware of the AF operation sound. Lenses with quiet AF motors are suitable for shooting subjects that are sensitive to sound, such as wild animals.
In-lens image stabilization
The in-lens image stabilization mechanism is an important function when shooting handheld, where camera shake is likely to occur. Some cameras also have a mode for panning. In addition, if the effect level can be adjusted, the range of expression will be expanded.
Expand your photographic expression with panning shots
It takes practice to take good panning shots, but once you've mastered it, the scope of your photographic expression will expand greatly. Try taking pictures proactively while paying attention to the shutter speed settings, form, composition, etc. Don't be afraid of failure, but trying again and again is the quickest way to improve.

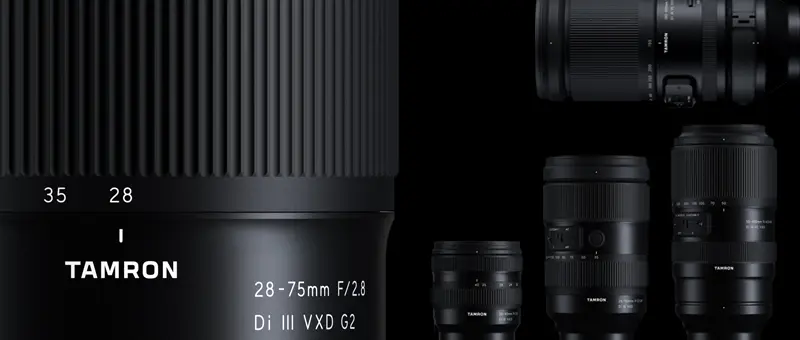
Lens Featured in this Impression
-
-
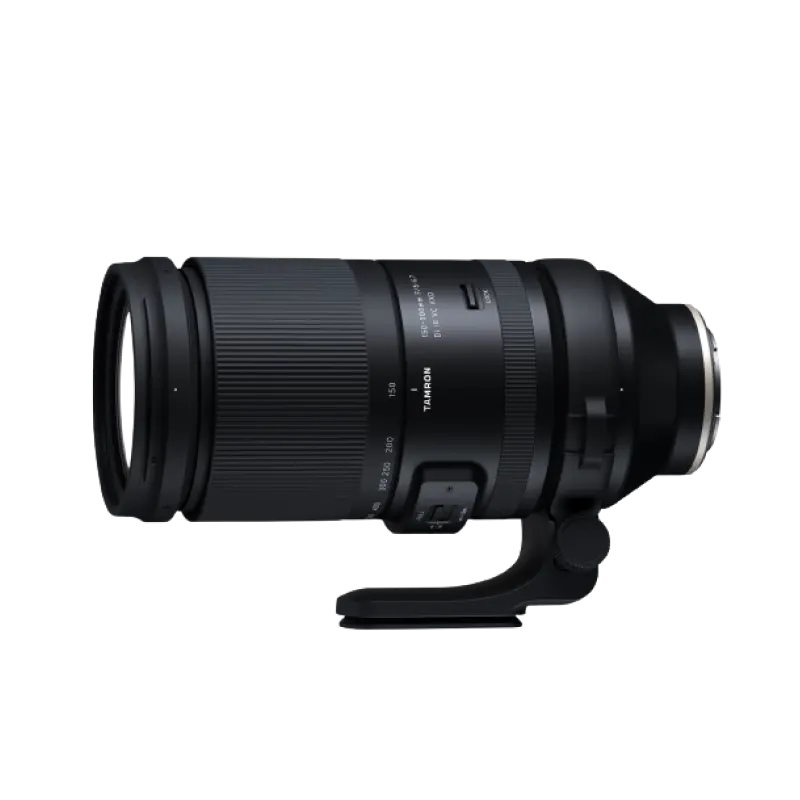
150-500mm F/5-6.7 Di III VC VXD a057(Model )
The 150-500mm F/5-6.7 Di III VC VXD (Model A057) is compact enough to be handheld while maintaining a focal length of 500mm on the telephoto end. It allows users to easily enjoy the world of the 500mm ultra-telephoto lens while maintaining its high image quality. The high-speed, high-precision AF with excellent tracking performance and the VC mechanism support handheld shooting in the ultra-telephoto range.
-
-
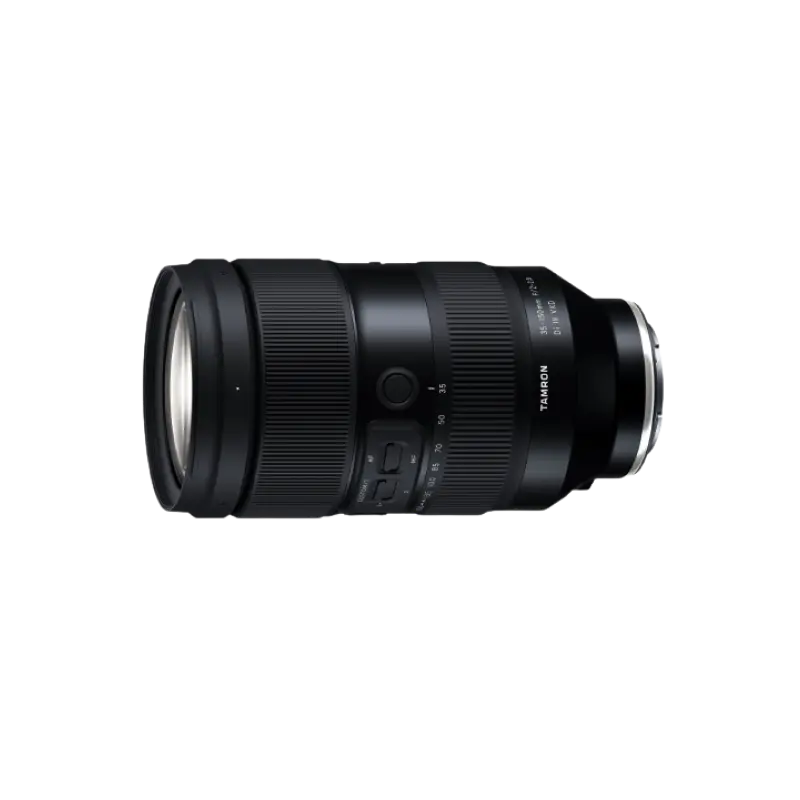
35-150mm F/2-2.8 Di III VXD a058(Model )
The 35-150mm F/2-2.8 Di III VXD (Model A058) is a high resolution travel zoom lens that covers everything from the 35mm wide angle to the 150mm telephoto focal length, the first zoom lens achieving an aperture of F2 at the wide angle end. It has a groundbreaking fast-aperture and utilizes the linear motor focus mechanism VXD (Voice-coil eXtreme-torque Drive), thereby achieving high speed, high precision autofocusing. The innovative lens design enabled us to greatly improve the lens's grip and functionality. The software, developed in-house, enables to easily customize functions and to update firmware.
-
-
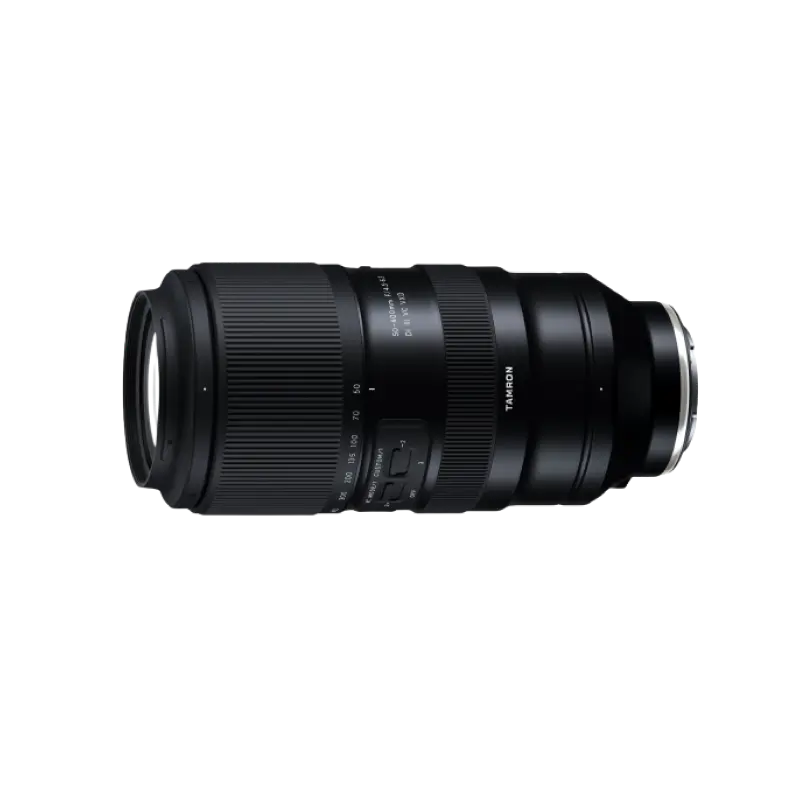
50-400mm F/4.5-6.3 Di III VC VXD a067(Model )
The 50-400mm F/4.5-6.3 Di III VC VXD (Model A067) is an ultra-telephoto zoom lens with an 8x zoom starting at 50mm at the wide-angle end and compatible with full-frame mirrorless cameras. The lens delivers uncompromised high image quality over the entire 50-400mm focal length range, yet is as compact and lightweight as a 100-400mm class lens. Equipped with the VXD mechanism and the VC mechanism, the lens can quickly focus on the subject's movement when shooting sports and wild birds. The 50-400mm F4.5-6.3 VC is a new ultra-telephoto zoom lens that combines unparalleled image quality and mobility.
-
-
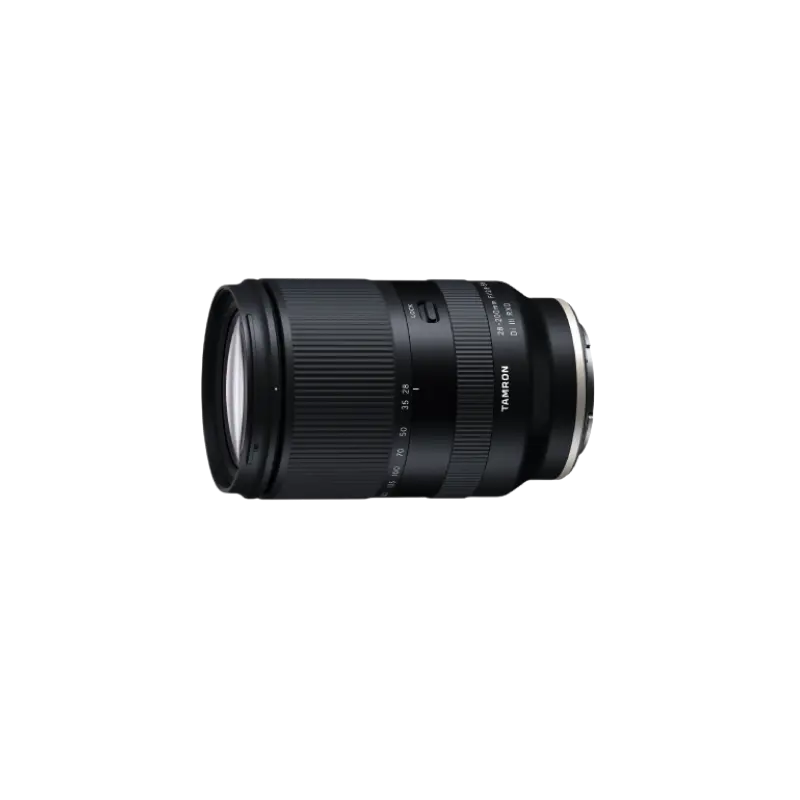
28-200mm F/2.8-5.6 Di III RXD a071(Model )
Tamron has distilled all the technical capabilities and know-how amassed over the last 28 years in its development of all-in-one zoom lenses into the creation of this 28-200mm F/2.8-5.6 Di III RXD (Model A071), designed exclusively. The lens has a large maximum aperture of F2.8 at 28mm wide end, which represents a world’s first* for all-in-one zoom lenses, and delivers high-level performance across the entire zoom range, from the 28mm wide-angle end to 200mm telephoto.
-
-
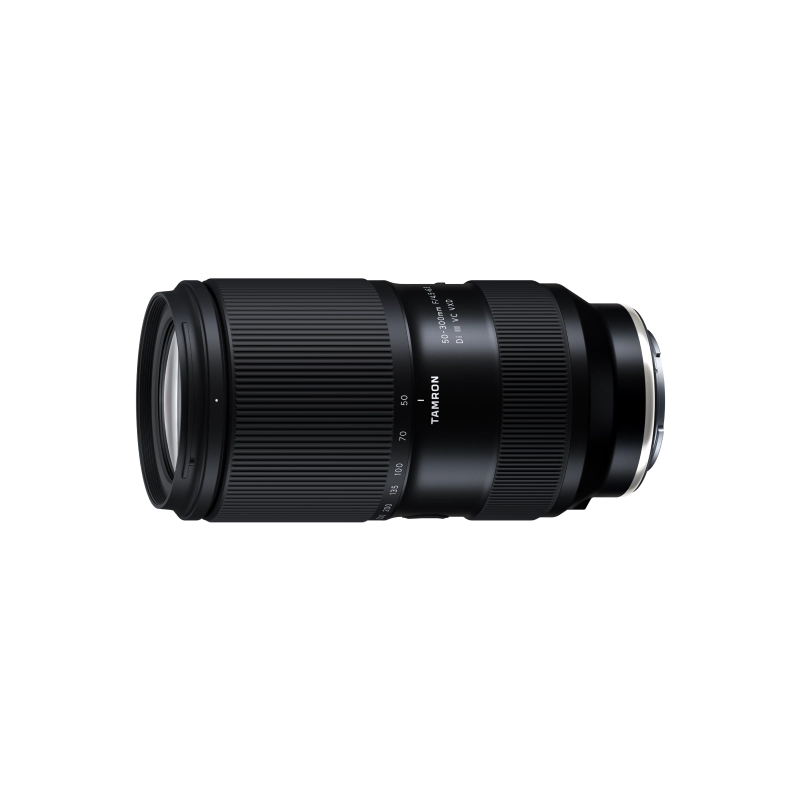
50-300mm F/4.5-6.3 Di III VC VXD a069(Model )
50-300mm F/4.5-6.3 Di III VC VXD (Model A069) is a 6x telephoto zoom lens for Sony E-mount that delivers outstanding convenience and image quality. Discover the groundbreaking capabilities of a 300mm telephoto zoom that starts from 50mm at the wide end.